In a nutshell
- 🔬 The lift comes from baking soda reacting with an acid to release carbon dioxide; proteins and starch provide the scaffold while moderate heat sets bubbles for fluffy structure.
- 🧪 Smart pairing matters: choose buttermilk, thinned yoghurt, or soured milk, and use roughly 1/4–1/2 tsp baking soda per 150 g flour to balance tang, rise, and avoid soapy flavours.
- 🍳 Technique is speed: keep wet and dry separate until the last moment, don’t overmix, allow a brief rest if needed, cook on medium heat, and flip once when edges set and bubbles dry.
- 🛠️ Troubleshoot fast: test baking soda freshness in vinegar, rebalance if bitter (less soda or more acid), lower heat for over-browning, thin thick batter, and avoid toughness by limiting gluten development.
- 🥞 Pro tips: adjust liquid for wholemeal or cocoa, use sugar and salt for flavour and browning, keep pancakes warm on a rack at 90°C, and, if rise lags, add a pinch of baking powder without pushing alkalinity.
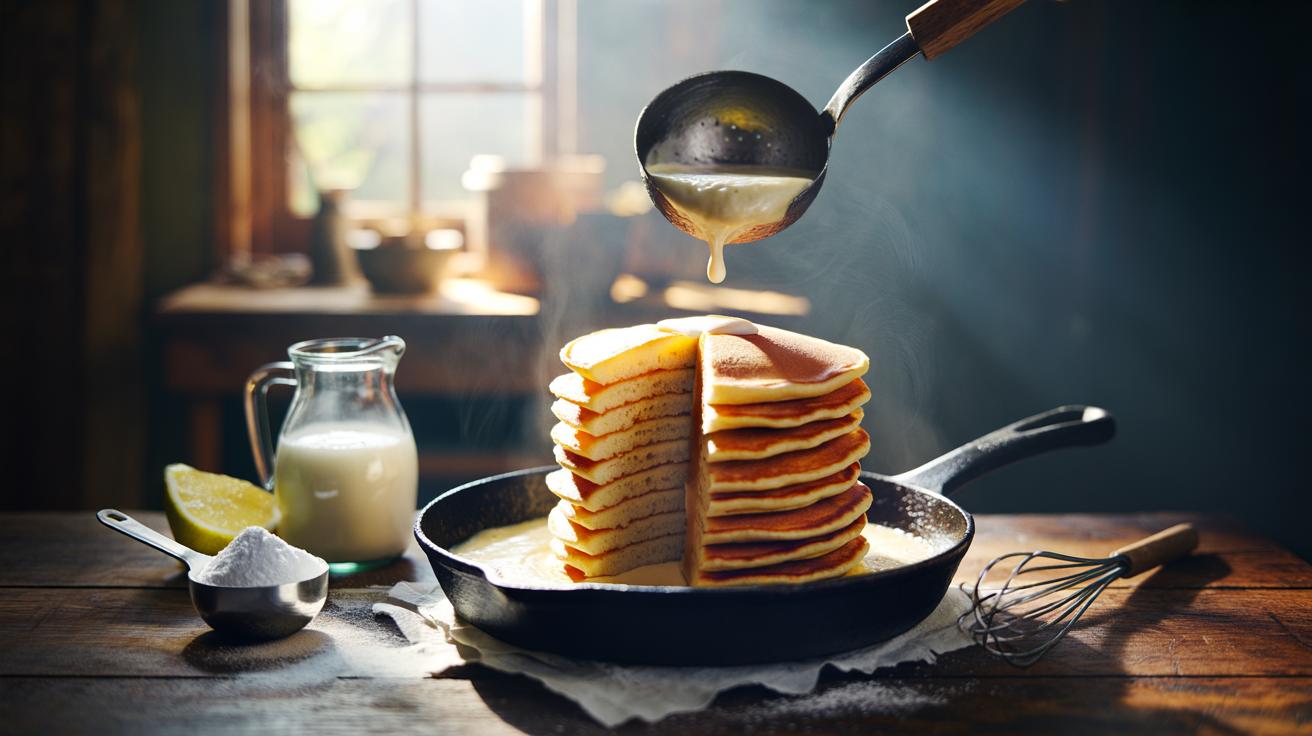
Saturday morning. The pan warms, the kettle sings, and you’re after pancakes with real lift rather than limp disks. The secret isn’t a fancy gadget or a three-day starter. It’s humble baking soda, triggered by the right acid to release fast, reliable carbon dioxide. That gas inflates tiny bubbles; the heat sets the batter around them, and your stack rises before your tea cools. Get the ratio and timing right, and you’ll go from whisk to plate in minutes. Here’s the chemistry, the method, and the fixes—written for home cooks who want café-height pancakes without faff, and for curious readers who like to understand why a trick works, not just that it does.
The Science Behind the Rise
Baking soda, or sodium bicarbonate, is alkaline. Add an acid and moisture, and it releases carbon dioxide instantly. Those bubbles expand on the griddle, then proteins in egg and flour set to trap them. Result: lift. It’s simple, but not simplistic. The gas needs a scaffold. Without structure, bubbles pop and collapse, leaving pancakes dense. Flour provides starch; eggs bring proteins and emulsifiers; a little sugar aids browning and tenderness.
Acidity matters. With buttermilk, yoghurt, lemon juice, or vinegar, soda reacts immediately. That means timing is crucial. Once wet hits dry, the clock starts. Overdo the soda and you’ll taste soap and see excessive browning because a too-alkaline batter speeds Maillard reactions. Too little and you’ll miss the rise. Balance yields lift and a gentle tang that complements maple syrup or berries.
Heat plays a role too. Moderate heat lets bubbles expand before the crust sets. Too hot and you’ll scorch the surface while the interior stays stodgy. Medium to medium-low is the sweet spot for even expansion and a tender crumb. Think patient sizzle, not aggressive sear. A heavy pan helps maintain steady temperature between batches.
Choosing the Right Acid and Ratio
Pick an acid that suits your pantry and palate. Buttermilk is classic: tangy, creamy, dependable. Thinned Greek yoghurt gives body. A quick fix—milk soured with lemon juice or vinegar—works brilliantly. Each option brings different strength, so the amount of baking soda changes. As a rule, pair soda with a definite acid; if you’re using plain milk, use baking powder instead or add an acid source. Neutralise enough acidity for lift, but not all—some tang brightens flavour.
| Acid Source | Per 150 g Flour | Baking Soda | Flavour Notes | Tip |
|---|---|---|---|---|
| Buttermilk | 240 ml | 1/4–1/2 tsp | Tangy, classic crumb | Start at 1/4 tsp; increase for extra lift |
| Greek yoghurt (thinned with milk) | 200 ml yoghurt + 40 ml milk | 1/4–1/2 tsp | Rich, custardy | Whisk smooth to avoid lumps |
| Milk + lemon juice | 240 ml milk + 1 tbsp lemon | 1/3–1/2 tsp | Fresh, light tang | Rest 5 minutes to curdle before mixing |
| Milk + vinegar | 240 ml milk + 2 tsp vinegar | 1/3–1/2 tsp | Clean acidity | Use white wine or cider vinegar |
Salt and sugar don’t just season; they influence structure. A tablespoon of sugar per 150 g flour nudges browning and tenderness. A pinch of salt sharpens flavour. If you add cocoa or wholemeal flour, increase liquid slightly and keep soda at the upper end—these ingredients bind moisture and can weigh down the rise.
Technique: From Whisk to Pan in Minutes
Set up first. Scale ingredients. Heat a heavy non-stick or cast-iron pan on medium. Lightly oil; add a knob of butter for flavour if you like, but keep it from smoking. In one bowl, whisk flour, sugar, salt, and baking soda. In another, mix egg, chosen acid source, and melted butter. Wet meets dry at the last possible moment. That’s your speed advantage.
Pour wet into dry. Stir with a spatula until just combined; streaks of flour are fine. Lumps are fine. Don’t overmix. Overbeating develops gluten, pushing gas out and toughening the crumb. If using soured milk, a 3–5 minute rest lets starch hydrate, but no long naps—soda works quickly. You’ll see gentle puffing begin in the bowl. That’s your cue to cook.
Ladle batter onto the warm pan—about 60–80 ml per pancake. Watch for bubbles forming and, crucially, the edges drying and bubbles setting on top. Flip once. Two minutes on the first side, one to two on the second, depending on heat and thickness. Keep the heat slightly lower than you think. For batch cooking, park finished pancakes in a low oven (90°C) on a wire rack to prevent sogginess.
Troubleshooting: Common Pitfalls and Quick Fixes
Flat pancakes? Check freshness. Baking soda weakens with time. Test a pinch in vinegar; it should fizz enthusiastically. If it sulks, replace it. Next, scrutinise your acid. With plain milk and no acid, soda can’t generate gas; switch to baking powder or add lemon juice. Expired leavener equals expired lift. Also, be wary of heavy add-ins—choc chunks, nuts—fold them gently and cook slightly smaller pancakes.
Bitter or soapy flavour signals too much soda or too little acid. Dial soda down to 1/4 tsp per 150 g flour, or increase acid modestly. Excess alkalinity also darkens pancakes prematurely. Lower the heat and rebalance the batter. If the outside burns while the centre stays raw, your pan is too hot or your pancakes too thick; thin the batter with a splash of buttermilk and reduce the flame.
Tough texture usually points to overmixing and overdeveloped gluten. Mix less. Stir, then stop. If using wholemeal flour, add an extra tablespoon or two of liquid and give the batter a brief 5–10 minute rest to hydrate bran. For last-minute rescue, a teaspoon of baking powder can supplement a weak soda reaction, buying you lift without pushing alkalinity further. Measure, don’t guess. Precision pays off in fluffiness.
You don’t need a chef’s brigade to stack a plate high with airy pancakes—just a reliable acid, a measured pinch of baking soda, and the confidence to mix and cook without dawdling. The chemistry gives you speed; the technique gives you texture; your toppings supply drama. Try buttermilk one week, yoghurt the next, and note how each changes flavour and rise. The best method is the one you can repeat on a sleepy morning. What acid-and-soda pairing will you try first, and which toppings will you crown your tallest stack with?
Did you like it?4.4/5 (28)