In a nutshell
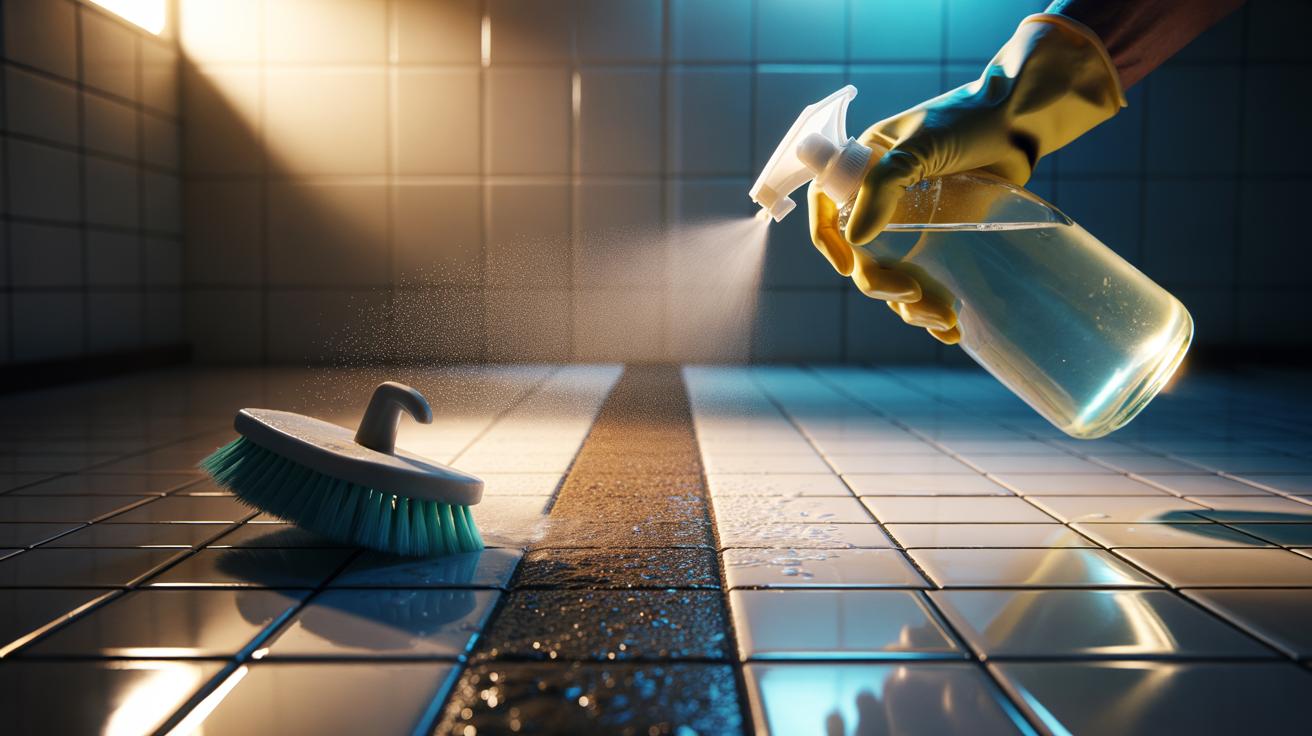
- 🧽 Two-minute vinegar method: Spray grout with white vinegar, wait 60–120 seconds, scrub with a soft brush, rinse and dry for instantly brighter tiles.
- 🧪 Why it works: ~5% acetic acid dissolves alkaline soap scum and limescale, lifting grime from porous grout and sharpening those clean lines.
- ⚠️ Safety first: Never use vinegar on natural stone (marble, limestone, travertine), avoid mixing with bleach, test coloured/epoxy grout, ventilate and wipe overspray on metal trims.
- 📏 Ratios & dwell: Use neat vinegar or a 1:1 dilution for maintenance; keep dwell under 3 minutes, don’t let it dry, and rinse thoroughly to prevent re-crystallising residues.
- 🧰 Pro tips: Add a pinch of bicarbonate of soda for stubborn spots, work in small zones, use microfibre cloths, dry lines to stop mineral wicking, and reseal grout periodically.
Two minutes. That’s all it can take to make tired grout look startlingly fresh again. The trick isn’t exotic or expensive; it’s a humble bottle of white vinegar and a little technique. In kitchens and bathrooms, grout is a magnet for soap scum, limescale, and greasy films that dull even the glossiest tiles. Spritz, wait, scrub, wipe—simple. Yet the chemistry is quietly brilliant. Use it as a quick rescue before guests arrive or as a weekly reset. When time is tight, vinegar wins. Here’s how to transform grimy lines into crisp, clean borders and reveal the shine you forgot existed.
Why Vinegar Works on Grout in Minutes
Grout becomes grim because residues are mostly alkaline: soap deposits, hard water marks, and everyday kitchen films. Standard cleaners can mask the issue. Vinegar, at roughly 5% acetic acid, dissolves alkaline build-up with minimal effort, loosening it from the porous grout surface. This is not bleaching; it’s targeted removal. The acid dislodges minerals that cling to grout pores, so dirt releases fast. In short dwell times, you’re leveraging chemistry rather than brute force. That’s why the method is fast and surprisingly gentle on intact, ceramic surroundings when used correctly.
There’s a visual sweet spot: allow the vinegar to sit long enough to soften the film, not so long that it dries. Sixty to 120 seconds often suffices for light to moderate grime. Then agitation—just a soft brush or old toothbrush—turns lifted residue into a slurry that wipes away. The result looks dramatic because crisp grout lines frame tiles, amplifying perceived cleanliness. Crucially, vinegar also cuts lingering odours without synthetic perfumes. It’s low-cost, low-fuss, high-impact. That’s why homeowners keep reaching for it, and why it’s the perfect two-minute turnaround trick.
Two-Minute Cleaning Method: Step-by-Step
Gather a spray bottle, white vinegar, a soft-bristled brush, microfibre cloth, and warm water. Ventilate. Sweep or vacuum dry debris so grit doesn’t scratch. Lightly spray grout lines—aim for glistening, not dripping. Start a timer. Let it dwell for 60–120 seconds. On glossy tiles, keep the spray targeted to the grout to avoid streaking; you’re after precision. Agitate with short, snappy strokes. You’ll see cloudiness lift. Wipe the slurry with a damp cloth, then rinse the area with clean water to neutralise and remove any residual acid. Dry buff for a crisp finish. That’s the two-minute rescue, done.
For stubborn corners, add a pinch of bicarbonate of soda to your brush after the vinegar dwell. The gentle abrasion helps, and the temporary fizz signals interaction with mineral deposits. Don’t overdo it—grout is porous. Less pressure, more passes. Finish by drying grout lines; water left to sit can pull fresh minerals to the surface as it evaporates. If you’re cleaning a large floor, work in small zones so vinegar doesn’t dry out. Keep a second cloth just for rinsing. You’ll move quickly and see immediate, gratifying contrasts line by line.
| Surface/Grout Type | Vinegar Ratio | Dwell Time | Notes |
|---|---|---|---|
| Ceramic/Porcelain tile, cement grout | Neat or 1:1 with water | 60–120 seconds | Best for soap scum and light limescale |
| Epoxy grout | 1:1 with water | 60 seconds | Test a discreet spot; wipe promptly |
| Heavily soiled cement grout | Neat | Up to 3 minutes | Do not let dry; rinse thoroughly |
| Natural stone (marble, limestone, travertine) | None | — | Do not use vinegar: risk of etching |
Safety, Surfaces, and When to Avoid Vinegar
Acids and stone don’t mix. Never use vinegar on marble, limestone, or travertine—you’ll etch the surface and dull the polish. If your bathroom has stone skirting, protect it with masking or a steady hand. With sealed grout, vinegar can nibble at the sealant over time; that’s not an immediate hazard, but a reminder to reseal periodically. Newly installed cement grout needs curing—usually at least seven days. Wait. Test a discreet corner first on coloured or decorative grout to ensure there’s no unexpected lightening or softening of a cheap dye. And note: never mix vinegar with bleach—that releases harmful gases.
Metal trims along tile edges can be sensitive; wipe any overspray quickly. Keep the space ventilated to avoid lingering acidity in the air and protect any reactive fixtures. If you’re in a hard-water region, you may need a slightly longer dwell—still, keep it under three minutes and don’t let the solution dry. Rinse well to stop residue from re-crystallising as the floor dries. For habitual maintenance, switch to a 1:1 dilution to be kinder to sealers while retaining bite. Gloves help if you have sensitive skin. The goal is simple: clean lines, intact finishes, zero drama.
The two-minute vinegar method is a small domestic victory with outsized visual payoff. It resets a room without exhausting your evening or your wallet, and it reduces reliance on harsh, perfumed chemicals that mask rather than solve. Use it as a weekly sweep or an emergency uplift before a viewing or a visit, then reserve heavier kit—steam, peroxide boosters—for truly deep restorations. Clean grout reframes everything. The tiles look brighter. The space feels calmer. And you did it with a cupboard staple. What’s your next target for a fast vinegar-powered revival: the splashback, the shower screen, or the kitchen floor lines marching towards the back door?
Did you like it?4.6/5 (27)