In a nutshell
- 🧪 White vinegar works thanks to its ~5% acetic acid, which dissolves mineral films and neutralises alkaline residues, revealing the floor’s existing gloss for that “mirror” effect.
- 🧰 Use the right method: mix ½–1 cup per 4 L of warm water, mop with a well-wrung microfibre pad in S-patterns, and dry-buff immediately; always sweep or vacuum first.
- 🚫 Surface safety matters: fine for sealed tiles, vinyl, and laminate (lightly), cautious on sealed hardwood; avoid natural stone and unsealed/waxed wood; spot test and follow manufacturer guidance.
- ⚠️ Stay safe: Never mix with bleach (toxic gas risk) and remember vinegar isn’t a hospital-grade disinfectant; use approved sanitisers when hygiene is critical.
- 🧼 Fix streaks fast: switch to distilled water for hard-water areas, refresh dirty solution, and consider a two-step clean; persistent cloudiness may indicate a worn finish rather than residue.
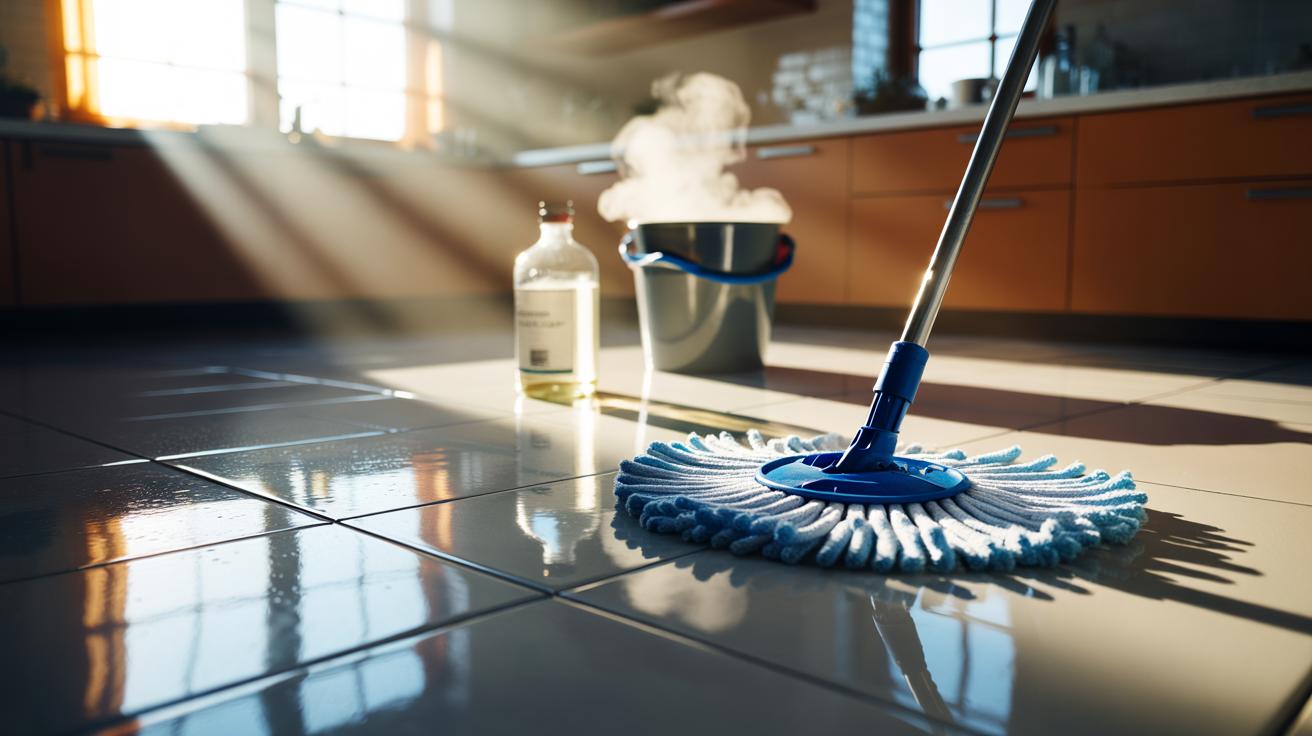
Household cleaning myths come and go, yet one budget staple keeps resurfacing with impressive results: white vinegar. The secret to a “mirror” floor isn’t magic; it’s chemistry and technique. When used properly, vinegar slices through dulling films, neutralises alkaline residues from soaps, and leaves a crisp, reflective finish that looks professionally done. There’s a knack to it. Get the dilution right. Choose the right mop. Dry-buff like you mean it. The payoff? A floor that catches the light and throws it back. Used carefully, white vinegar can deliver instant clarity without expensive polishes or heavy scents. Here’s how to make it work, and where not to use it.
Why White Vinegar Makes Floors Gleam
At the heart of white vinegar’s shine power is acetic acid, typically around 5%. That mild acidity dissolves mineral deposits from hard water, cuts through soap scum, and loosens the invisible film left by many “all-in-one” cleaners. Films scatter light. Remove them and you reveal the gloss that’s already there in the finish. It’s fast, too. Vinegar flashes off quickly, especially when mixed with warm water, so there’s less streaking and fewer tide marks than heavier detergents.
There’s another trick at play: neutralisation. Floors often look dull because of leftover alkaline residues. Vinegar counters that, helping restore a neutral surface that reflects light more evenly. It won’t add a coating or wax; it simply strips the haze. That’s key to understanding the “mirror” effect. Never use vinegar on natural stone like marble, limestone, or travertine — the acid can etch and permanently dull the surface. Think of vinegar as a safe reset for sealed ceramics, vinyl, laminate, and certain sealed woods, not a universal polish.
The Right Mix, Tools, and Method
Precision matters. For general cleaning, mix 120–240 ml (½–1 cup) of white vinegar per 4 litres of warm water. For stubborn haze, go to the higher end; for maintenance, the lower end often suffices. Use a clean microfibre mop or pad, wrung out well. Water is the carrier, not the point — keep it damp, not wet. Work in small sections. Mop in overlapping S-patterns, then immediately dry-buff with a fresh microfibre cloth to pop that reflective sheen. It’s simple and surprisingly quick.
Pre-clean first. Vacuum or sweep to remove grit that can scratch and dull. For grease-prone kitchens, add a single drop of mild washing-up liquid to the bucket, but go no further; too much soap reintroduces residue. Good ventilation accelerates evaporation and reduces streaks. Always do a spot test in an inconspicuous corner before committing to the whole room. For a rapid “mirror” refresh between full mops, lightly mist a 1:2 solution (vinegar:distilled water) and buff with a dry microfibre until the surface gleams.
Safety, Surface Compatibility, and Common Myths
Vinegar is safe on many, but not all, floors. Use it on sealed ceramic and porcelain tiles, vinyl, luxury vinyl tile (LVT), laminate (lightly damp only), and properly sealed hardwood where the finish acts as a barrier. Avoid unsealed or waxed wood, cork, and any natural stone. Cement-based grout tolerates occasional diluted vinegar, but frequent acidic cleaning can erode it over time. Frequency and dilution are the safeguards.
Never mix vinegar with bleach; it produces toxic chlorine gas. Also avoid mixing with hydrogen peroxide in the same container. Myth-busting time: vinegar is not a hospital-grade disinfectant. It has modest antimicrobial action, but it won’t replace approved sanitisers when hygiene is critical. Nor does vinegar “feed” or “condition” wood; it simply clears residues from the surface finish. When in doubt, check the floor manufacturer’s guidance. If they say “no acids”, skip vinegar and use a neutral pH cleaner instead to protect warranties.
| Floor Type | Vinegar Safe? | Typical Dilution | Notes |
|---|---|---|---|
| Sealed Tile (Ceramic/Porcelain) | Yes | ½–1 cup per 4 L | Buff dry for best shine |
| Vinyl/LVT | Yes | ½ cup per 4 L | Avoid soaking seams |
| Laminate | Yes, lightly | ½ cup per 4 L | Use damp, not wet |
| Sealed Hardwood | With caution | ¼–½ cup per 4 L | Spot test; dry immediately |
| Marble/Stone | No | — | Acid can etch surface |
Troubleshooting Streaks and Dull Patches
Streaks often mean too much product, too dirty a mop, or hard water leaving mineral spots as it dries. Fixes are simple. Switch to distilled water for mixing if your tap water is very hard. Change the bucket frequently. Rinse and wring the mop more often. If residue persists, you may be dealing with stubborn polymer or wax build-up from past cleaners. In that case, do a two-step: a neutral pH cleaner to lift grime, then a vinegar rinse to clear the haze, followed by an energetic dry buff.
Cloudiness after vinegar can signal an incompatible surface or a damaged finish rather than a cleaning error. Stop and reassess. On laminate, less is more — reduce dilution strength and moisture. On sealed hardwood, microfibre damp-mopping and fast drying are non-negotiable. If a patch refuses to shine after cleaning and buffing, the finish may be worn and in need of refinishing rather than more product. Lighting matters too; tackle floors in daylight or with angled task lights to spot missed films and buff them out on the spot.
Used smartly, white vinegar is a minimalist’s dream: one bottle, clear instructions, and a finish that looks like you hired a pro. The shine comes from removing what shouldn’t be there, not layering more on top. That’s why it’s instant and convincing. Keep the dilution modest, the mop clean, the buff decisive, and the surfaces appropriate. Your floor’s “mirror” moment is a few methodical minutes away. What room will you try first, and how will you tweak the routine — stronger mix, hotter water, or a fiercer buff — to nail your perfect shine?
Did you like it?4.5/5 (27)